
When we moved into our home over two years ago one of the things that I was most excited about was the balcony. We had spent a year living in a ground floor flat, and while we had a beautiful river right on our doorstep, there is something special about having your own little bit of outdoor space.
We were lucky that our home was pretty much ready to go in terms of needing anything done to it, and while I had lots of plans to put my own stamp on things decor-wise, one of the projects I was most eager to undertake was creating our own little bit of paradise on our balcony.

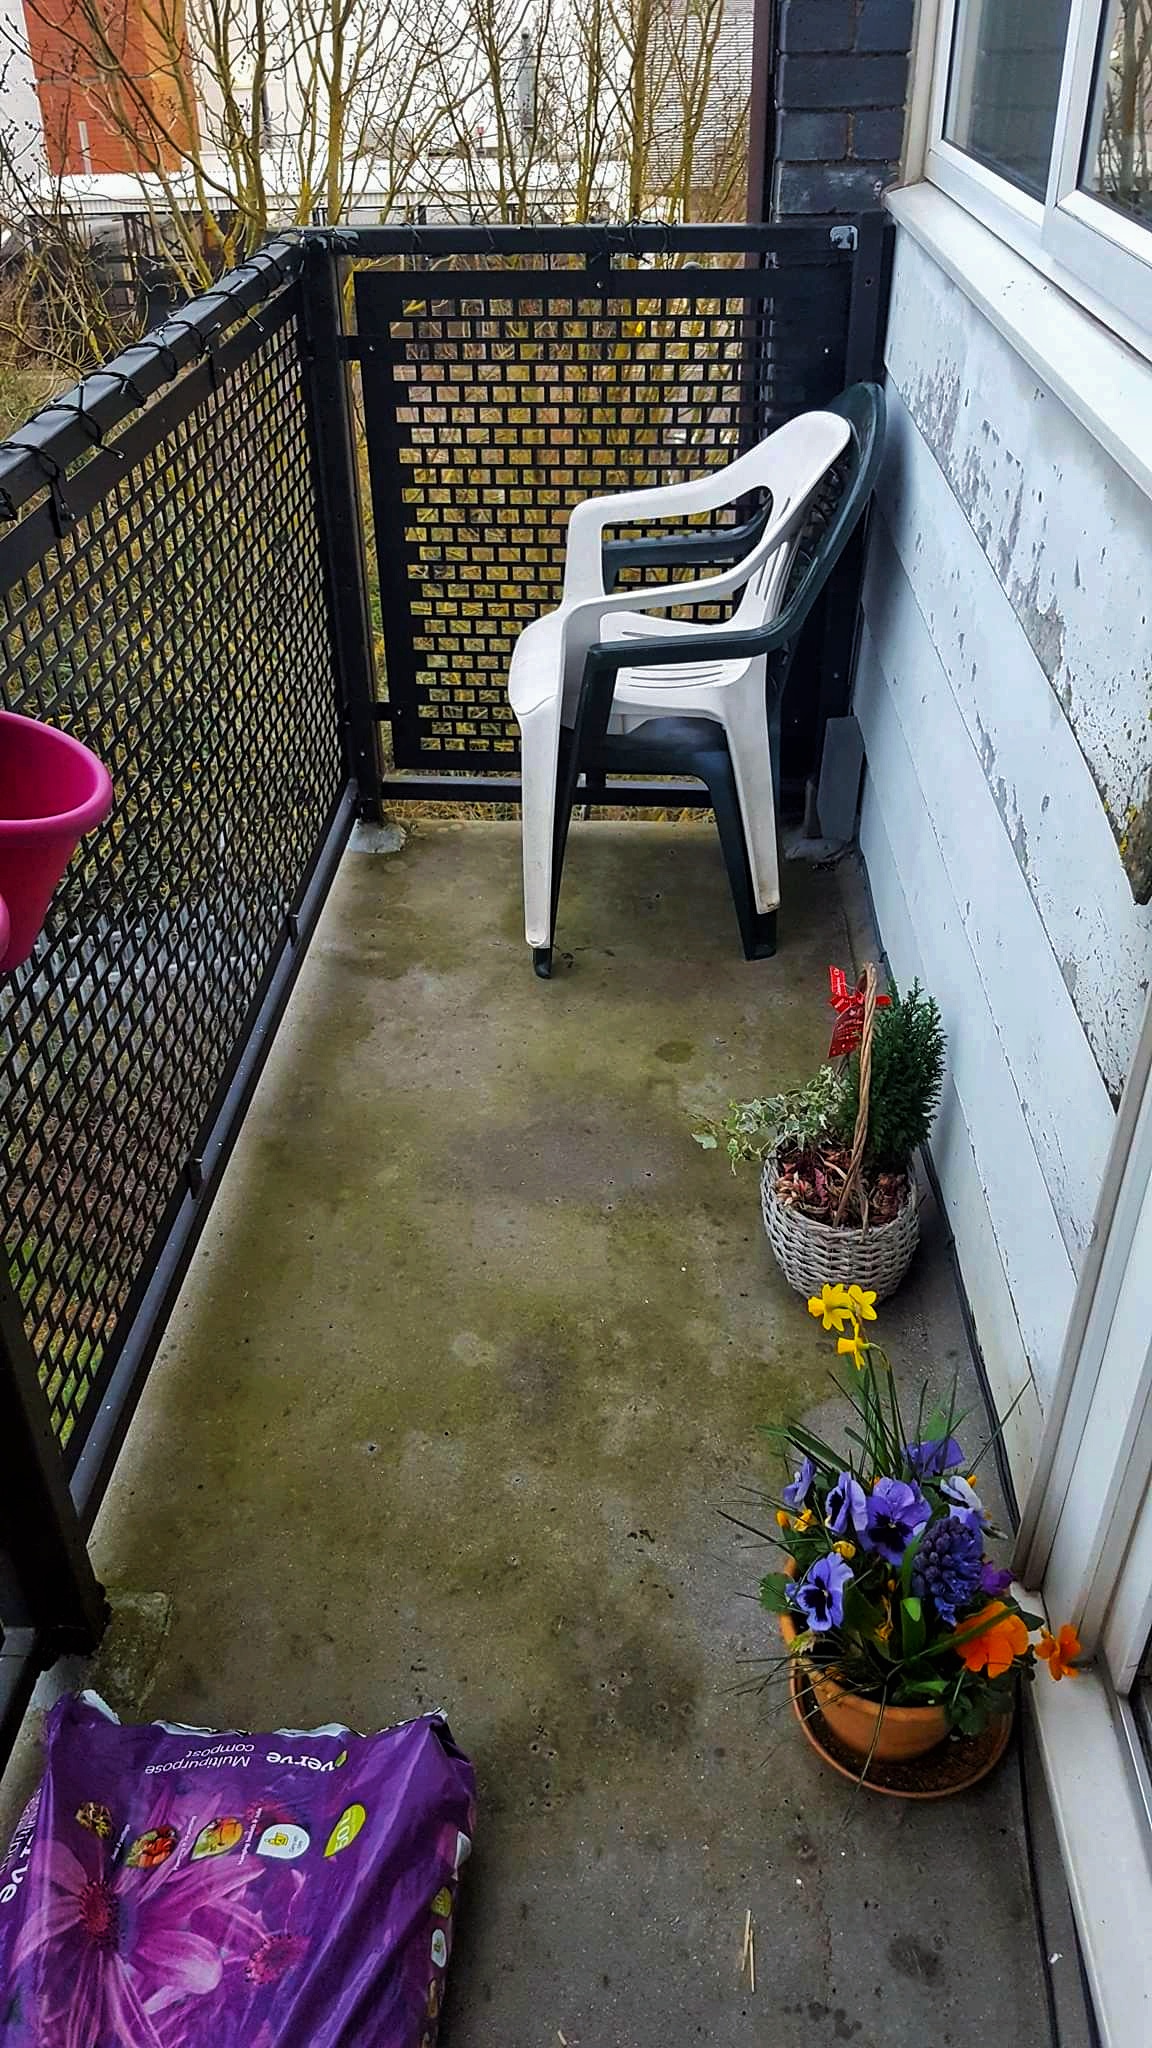
We moved into our house (it’s not a house in the traditional sense because we do live in a block like a block of flats, but we own part of the freehold, so it kind of is like a house. We also have two floors just like a little house too) in December 2016 so I had a good few months to decide exactly what I wanted to do when it came to the balcony. Cue lots of late night browsing on Pinterest, a few trips to B&M and a few Amazon deliveries too. Our balcony area was drab (iron railings, grey concrete) and I wanted to brighten it up and make it look like a miniature garden so I got to work. The good news is that this is SO affordable, so whether you have a small balcony area, a small garden or even are looking for some affordable options for your garden I am going to tell you how easy it is to take it from a boring dull balcony to a beautiful garden space that you will love spending time in.
Start with the flooring
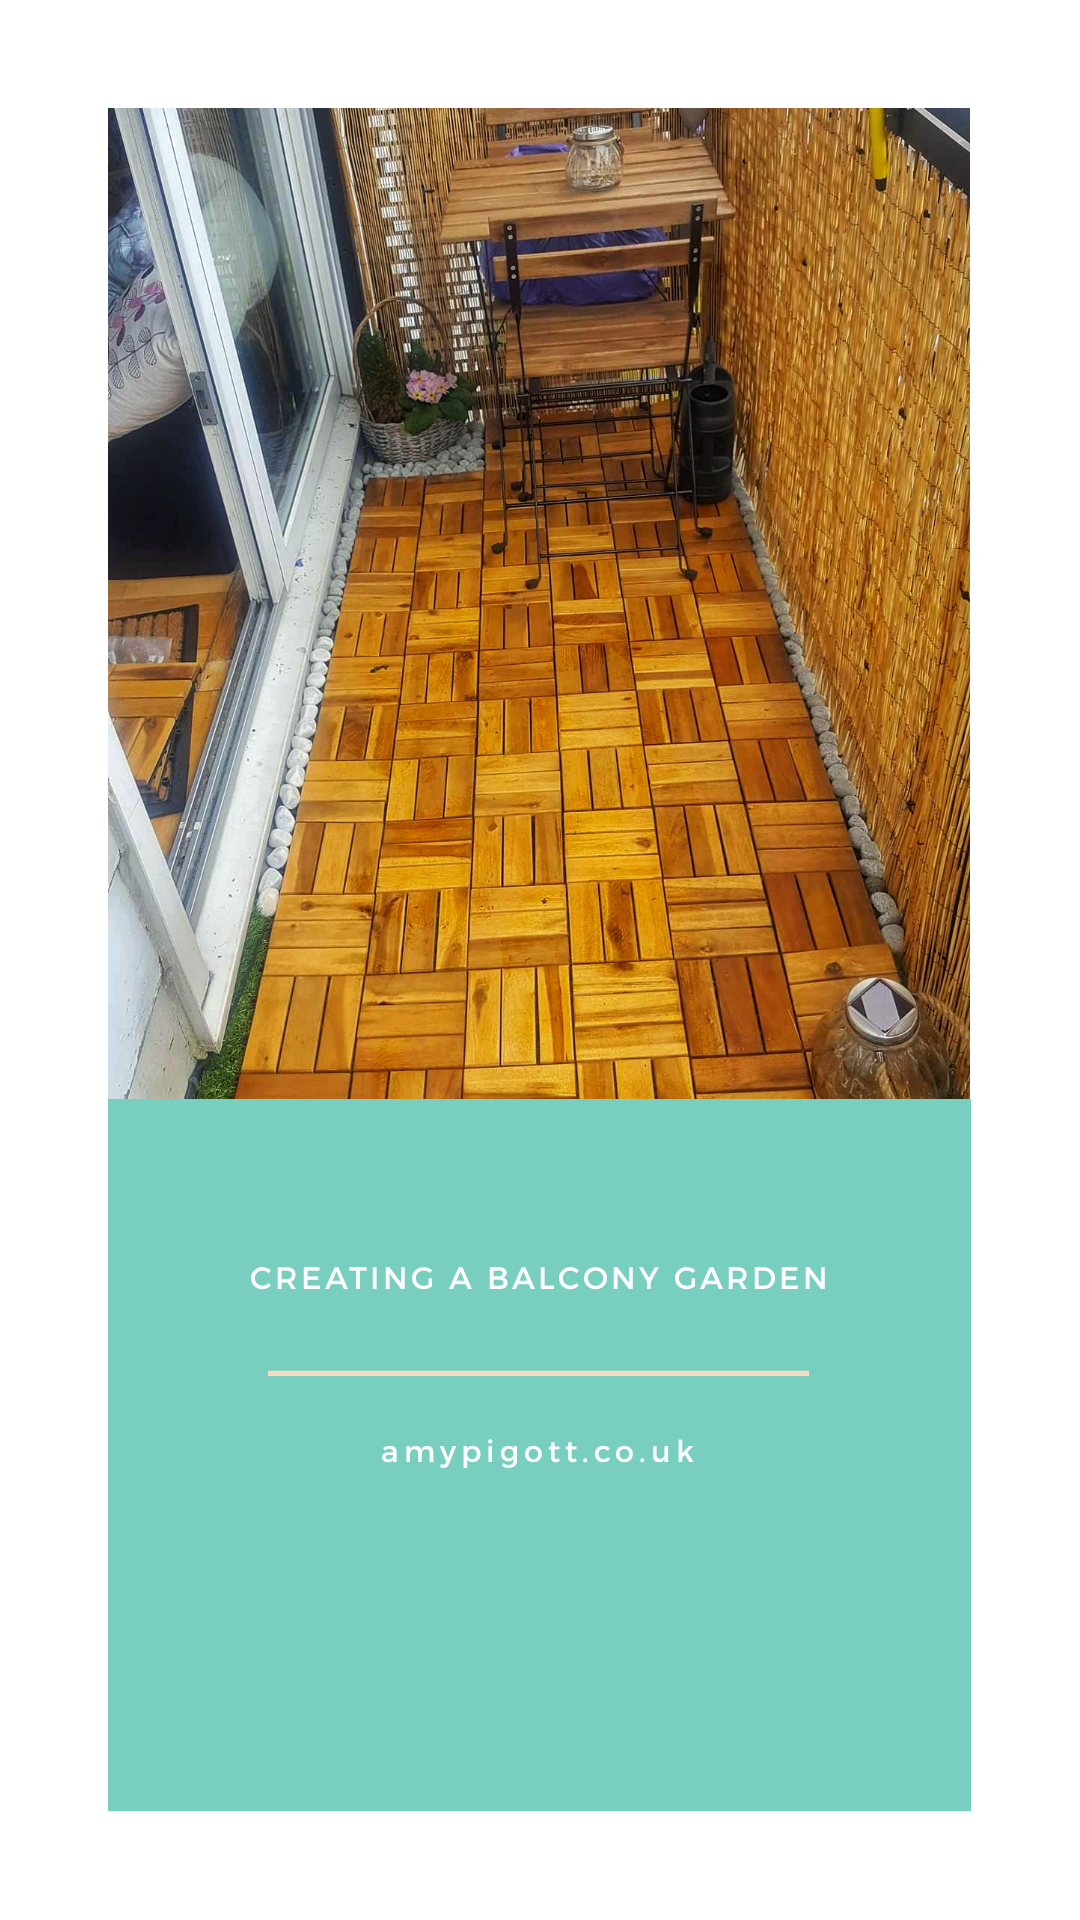
First thing I wanted to get sorted was the flooring and believe me when I say I ummed and ahhed about this for the longest time. Like I said, the balcony is made of dull grey concrete and it doesn’t make for a very beautiful environment. I really wanted an area that felt like a miniature garden so I opted for fake grass and also some wooden style decking slats which clip together. This helped to give me the illusion of a patio area on the decking and a small grass area (where I often will put plants…or at least I did the first year until I realised my finger is less green more brown).
First things first, I popped to B&M and purchased some fake grass and a 2m roll came in about £25 if I remember rightly. For the area I wanted covered I only needed half of that so I cut it in half (which let me tell you was the hardest part of the entire balcony remodel…) and I have the other half for when the first lot starts to look a little tired, which I am considering doing this year. I have had two years out of the current grass but it’s looks a little gross (maybe because our neighbours have been renovating and there was a lot of dust and dirt) so it might be time for a spruce up. You can pick up fake grass so many places but for an affordable option check out B&M. It looks great and is fairly inexpensive too. I’ve already seen these interlocking grass tiles on Amazon that I am really tempted to get when my grass has done its day too.

Next it was onto the decking/patio area. I took an age to decide on what tiles I wanted but ultimately settled on these interlocking wooden tiles. They are affordable, easy to use and really hard wearing. I bought a couple of packs to cover the area I have and so far I’ve only had a problem with 1 tile (and I have spares) so I am super impressed! They are easy to clean and I leave them down all winter too. They have worn really well and I think they really bring the whole patio part together.
Fencing
Although all our balcony’s are side by side and the sides aren’t that high I thought some privacy fencing would be a nice touch and also take away from the start black metal railing. We picked up a wooden privacy fencing from B&M and it worked exactly how I wanted. I think we have two in total to cover the total length around our balcony and just used cable ties to hold it in place against the railing. This will be its third summer up and it is still looking as good as new. Definitely try B&M for this rather than heading to some of the more expensive shops!
Accessories
Once everything was down and in place it was time to get it looking homely. Because the edges are a bit blunt on the balcony where the grass and decking ends I picked up some stones from a local garden centre to put around the edge to finish the look off. I love how it turned out, although I didn’t love lugging the stones all the way up the stairs!

Another addition was the garden furniture. We were given a gorgeous Ikea wooden patio set for a moving in gift (which is currently retailing for £54) and I love bringing this out every summer. I made a cute little table cloth and my talented mum who is the genius behind Blanket Stitch made the seat and back cushions. We’ve also got the parasol which fits to this table too, also from Ikea. Last summer we also picked up the balcony parasol from Ikea, with the heavy concrete base and it works amazing on the balcony as it has a flat side which sits perfectly against the wall. I have also attached this to the window to ensure it is safe should the wind ever kick up unexpectedly.
Other accessories we have purchased are various plant pots, that hang over the balcony and solar lights which make the whole area look beautiful on a summers evening.
We have one more addition to add this year, that I will hopefully be purchasing in the next couple of weeks and that is an external mesh door which will fit the other side of our patio door, meaning we can sit outside in the summer and not have to keep the door closed to avoid the bugs getting in. We can put our little one inside for a nap without worrying about the pesky bee’s or wasps getting in too.
Hope this answered all your questions about this little area, we absolutely love it and can’t wait to spend another gorgeous summer out here this year.
Some of the links in this post are affiliate links and therefore I receive payment when purchases are made through these links.